...
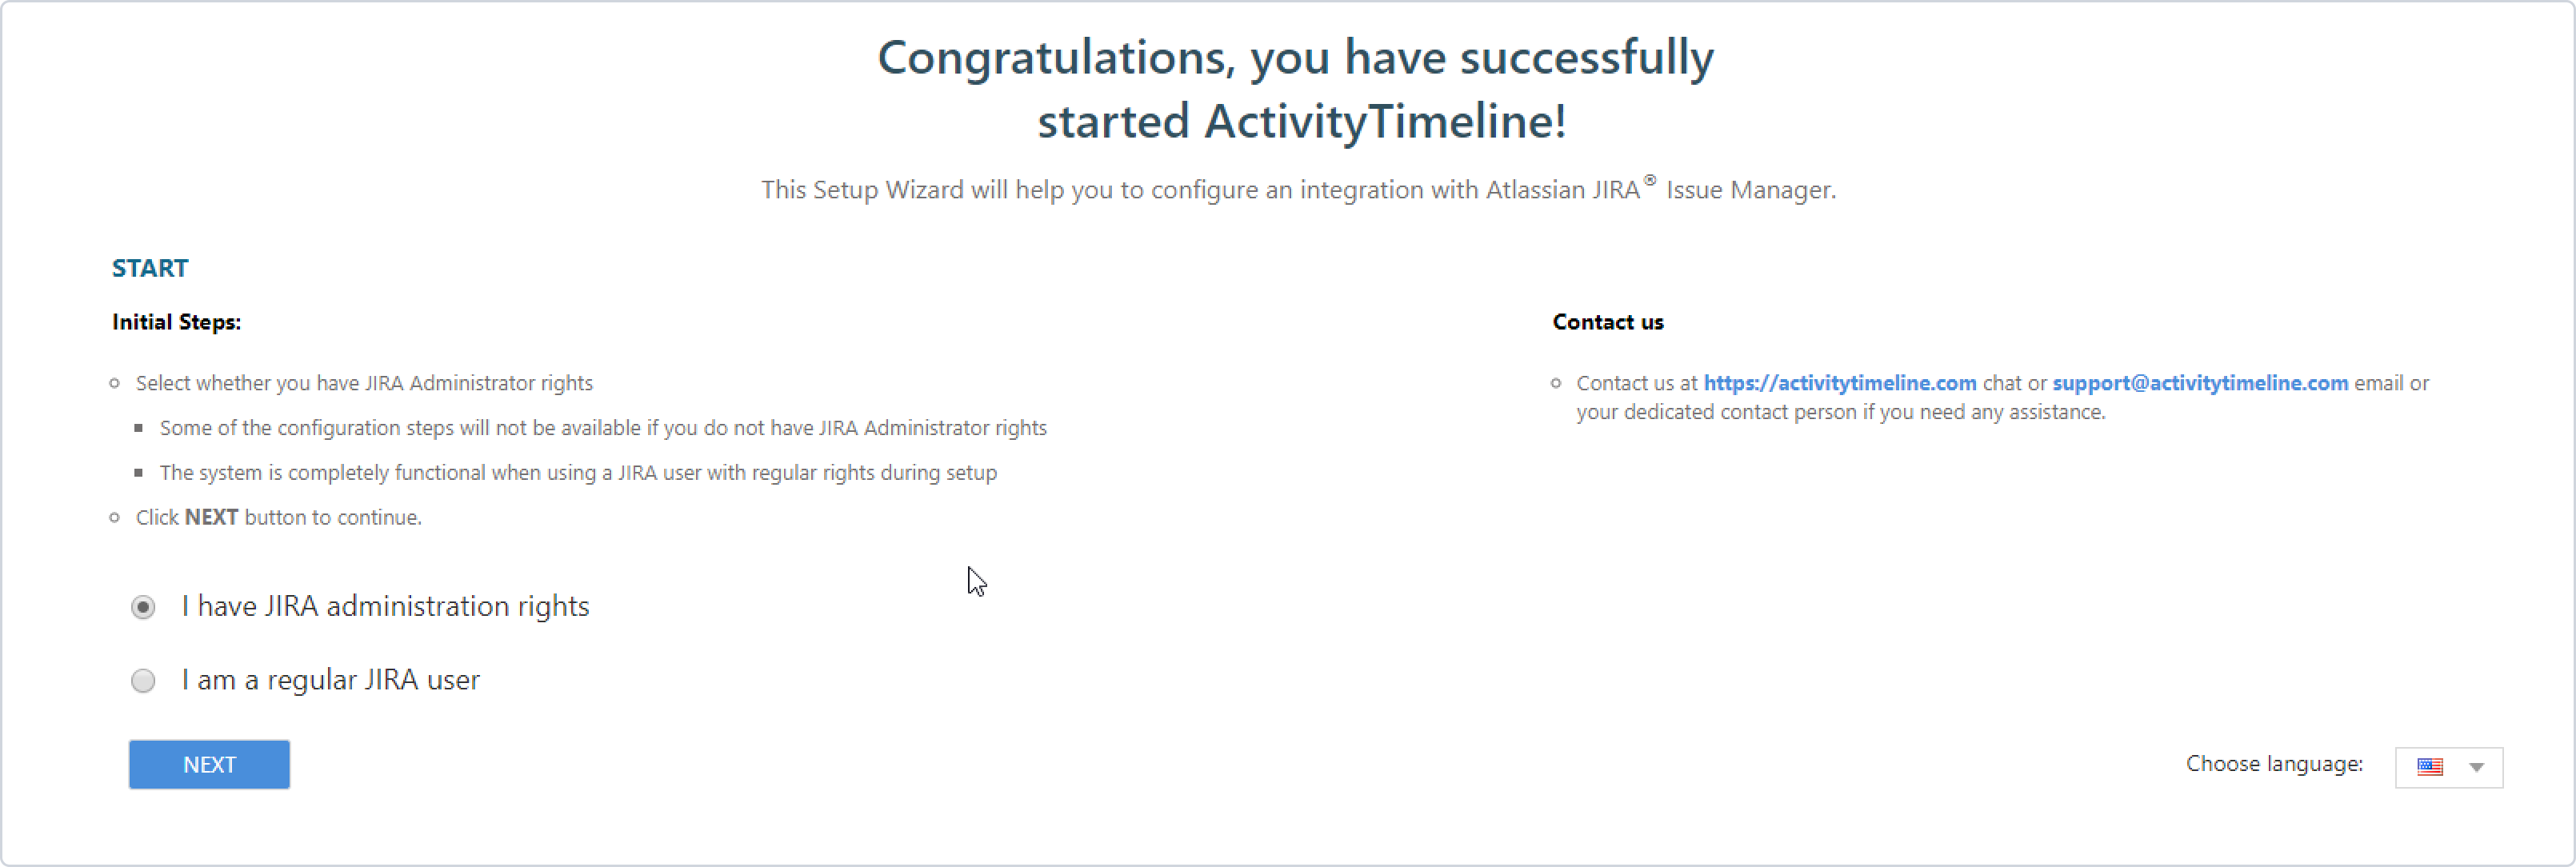
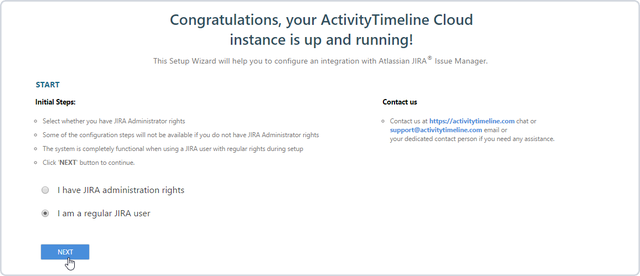
→ The user is redirected to the first page of Setup Wizard. The user is given instructions on the steps that has to be initially performed, and defines whether he/she is an admin or regular JIRA user.
Depending on JIRA role, different steps are available during setup.
Setup for JIRA Admin
...
...
...
...
...
...
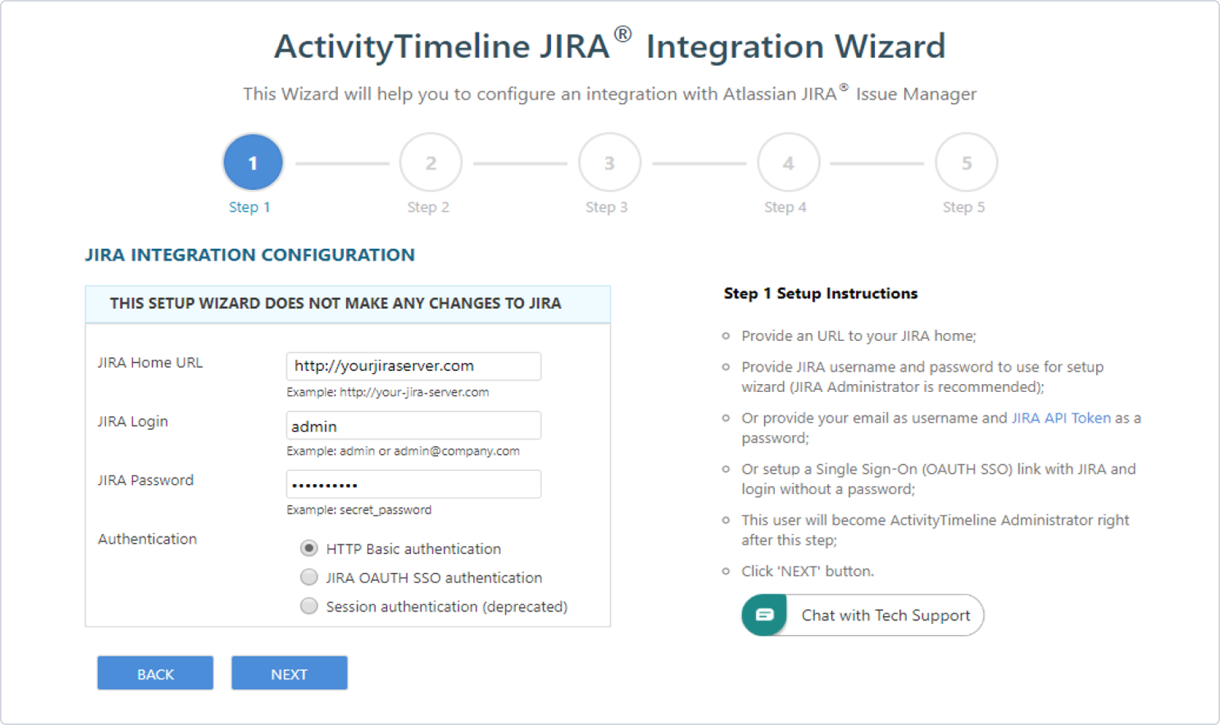
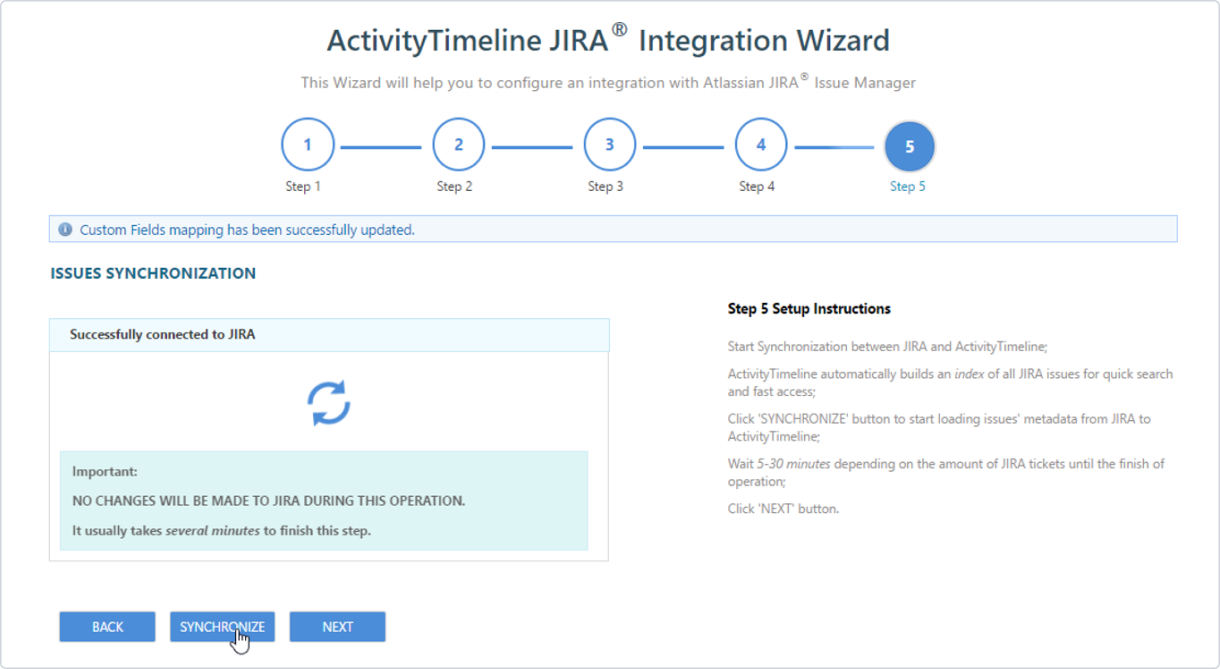
> click Next
To read more about JIRA OAUTH SSO authentication method: Single Sign-On Setup
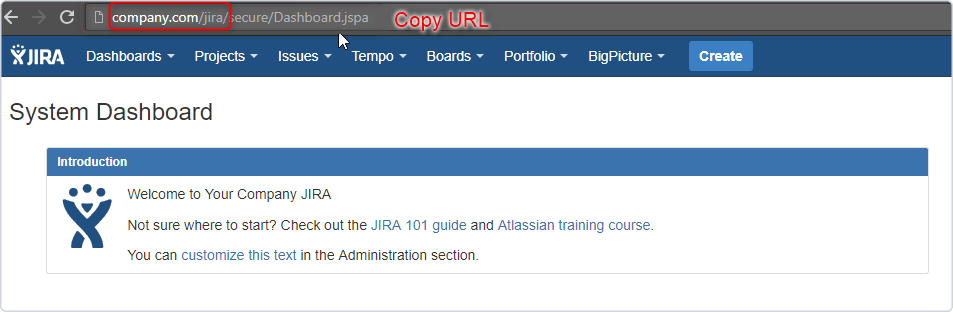
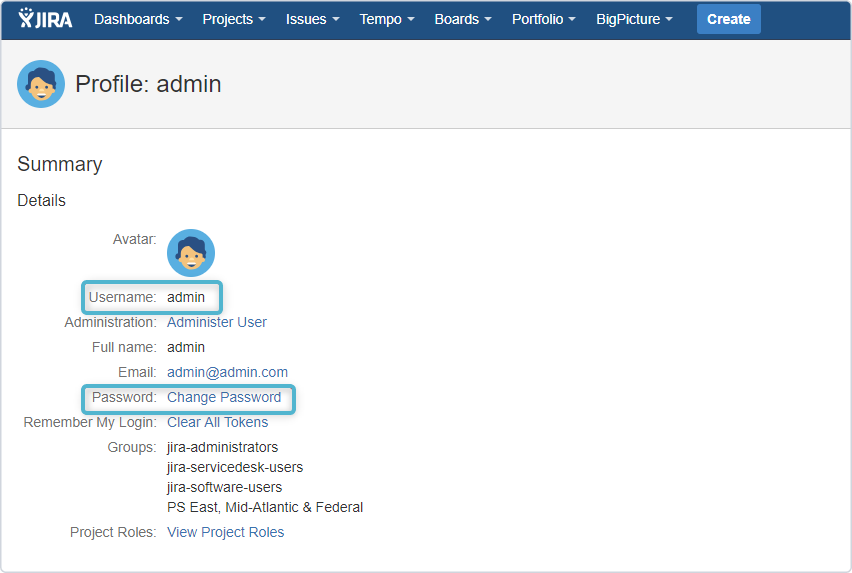
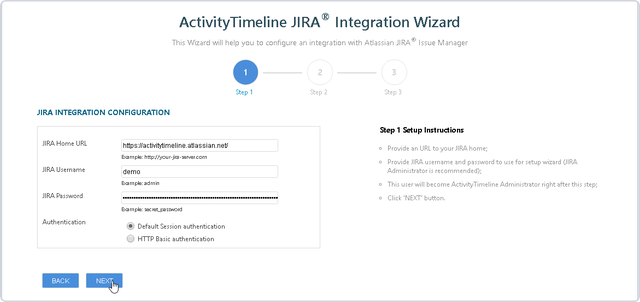
About JIRA Home URL, JIRA username and Password
...
...
...
...
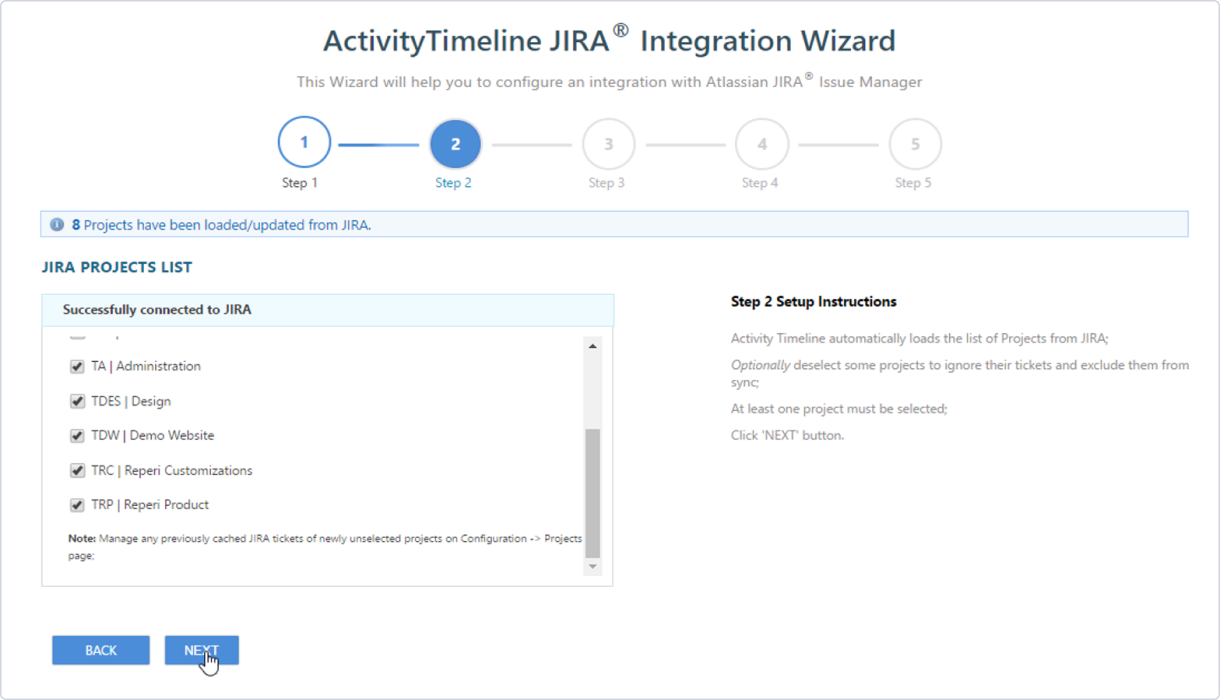
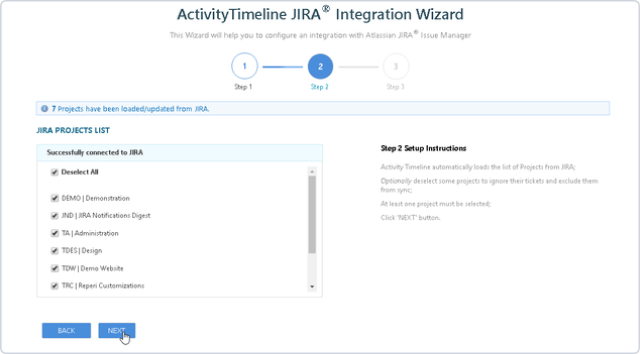
4. On Step 2 of JIRA Integration Configuration setup select projects to be loaded from JIRA. Deselect the projects you do not want to be shown on ActivityTimeline Dashboard. Click Next
...
About Jira Projects
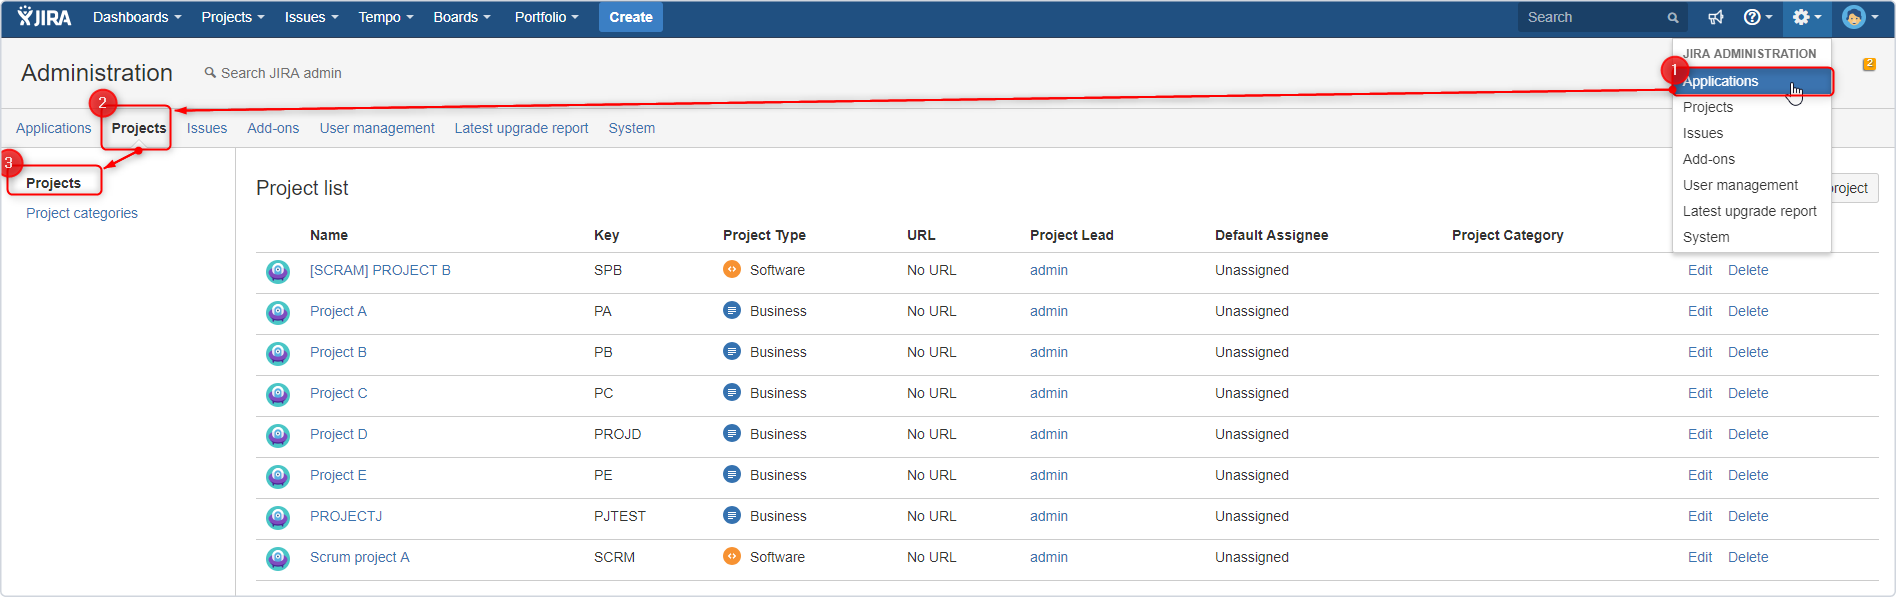
To check the Projects list in Jira open Jira, Open Jira Administration, click on Projects → Projects:
...
...
...
...
...
...
...
| Status | ||||
|---|---|---|---|---|
|
...
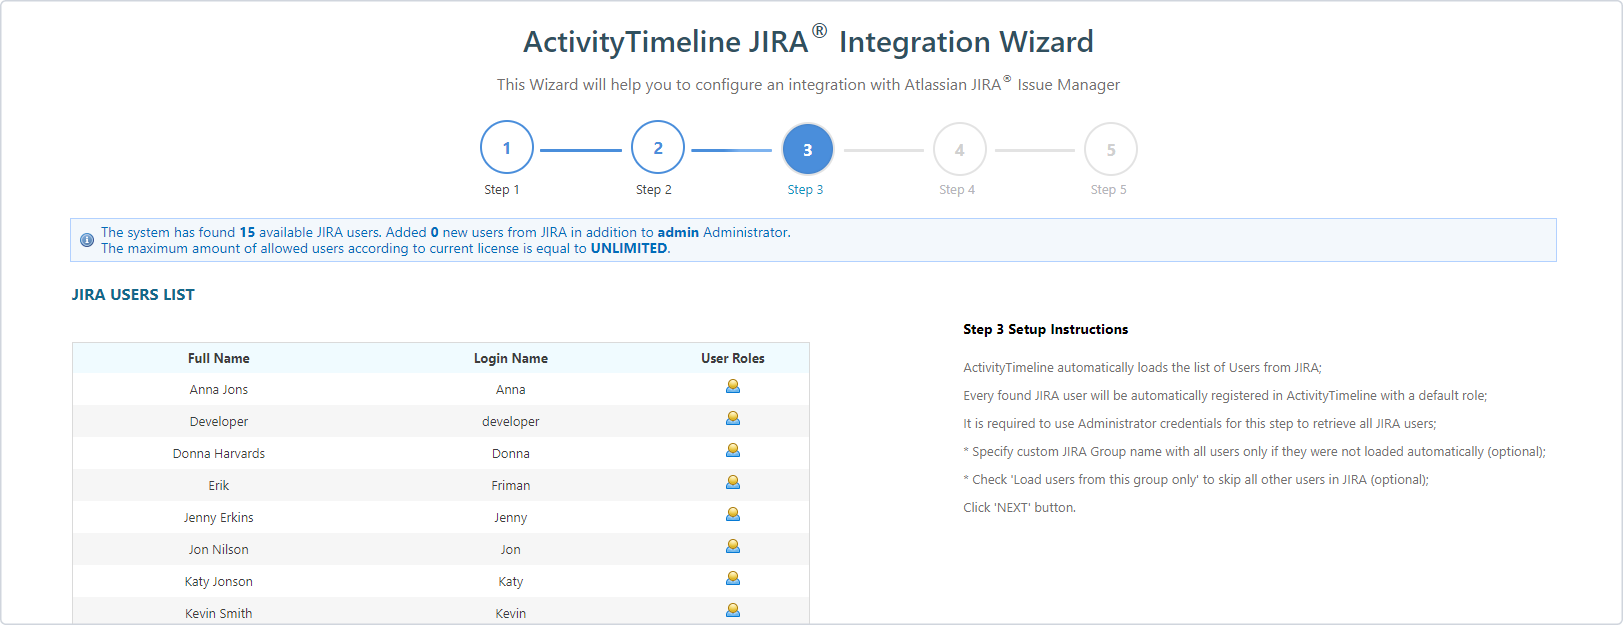
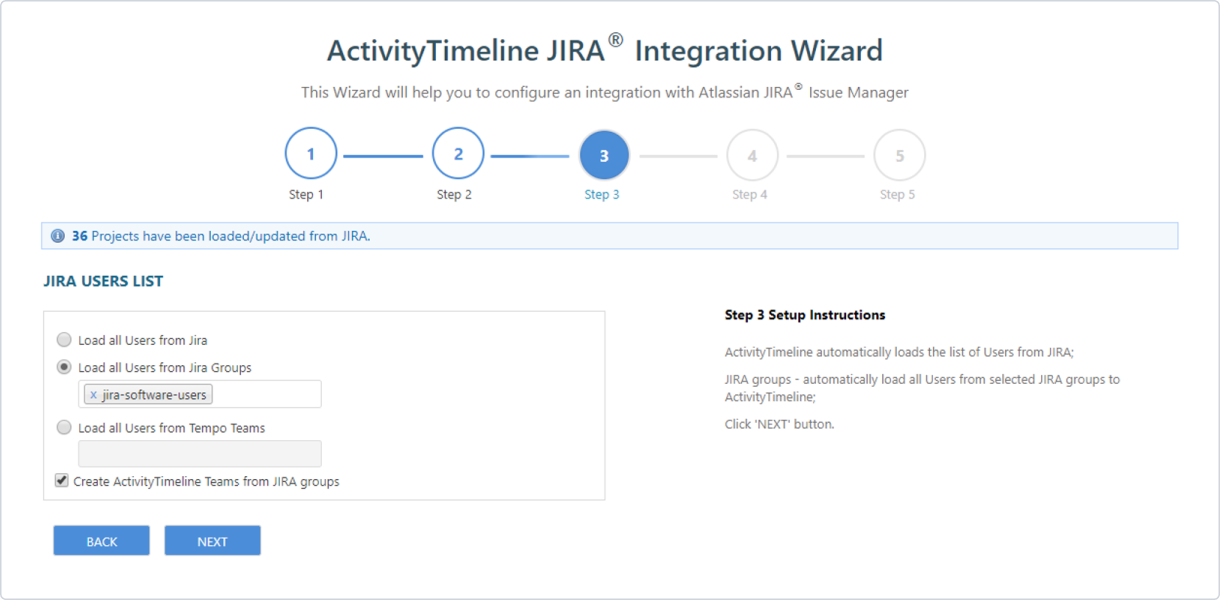
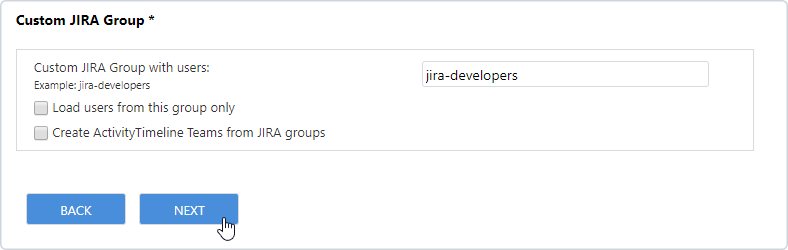
Additionally, you can define custom JIRA group of users and select Load users from this group only and Create ActivityTimeline Teams from JIRA groups options. Click Next
...
About Jira Groups
To check Jira Groups open Jira, open Jira Administration, click on User Management and click on Groups:
...

...
...
| Tip |
|---|
...
...
...
...
...
...
...
...
...
...
...
...
...
...
...
...
![]() Frequently Asked Question. Read more.
Frequently Asked Question. Read more.
📰 Helpful tips in our Blog.
📬 Questions? Contacts Us.
🤝 Contact details for Solution partners.
Search doсumentation
| Live Search | ||||
|---|---|---|---|---|
|