Requires "Application Link" setup in Jira's Administration page!
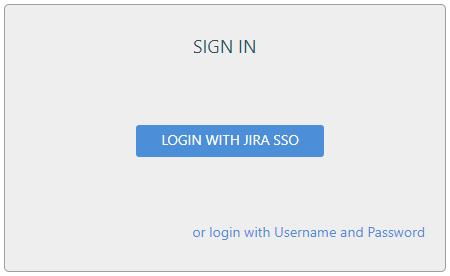
This page allows to configure SSO link (oAuth) between Jira and ActivityTimeline.
Users will be able to login into ActivityTimeline with a single button click.
There will be no need to enter username/password on ActivityTimeline Login form:
ActivityTimeline Single Sign-On Setup page: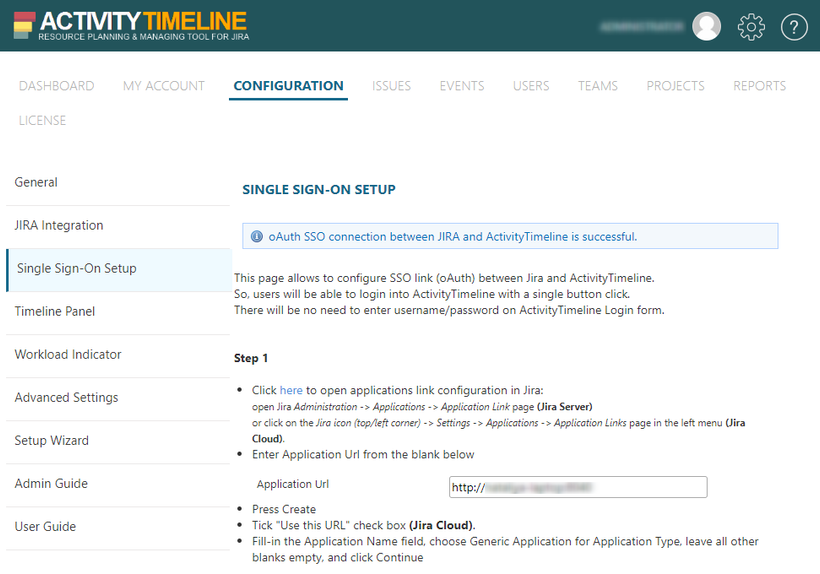
There are two statuses of oAuth SSO connection:
- ActivityTimeline has configured oAuth SSO connection

- ActivityTimeline without configured oAuth SSO connection

Procedure to configure Single Sign-On (SSO) between Jira and ActivityTimeline:
Step 1
- Open JIRA → Click on Gear icon → JIRA Administration → Applications (Jira Server)
or click on the Jira icon (top/left corner) → Settings → Applications → Application Links page in the left menu (Jira Cloud)
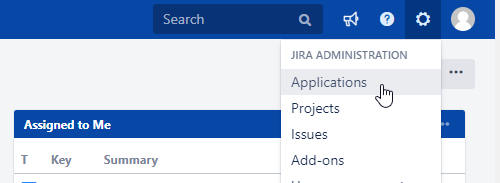
- Click on "Application links"
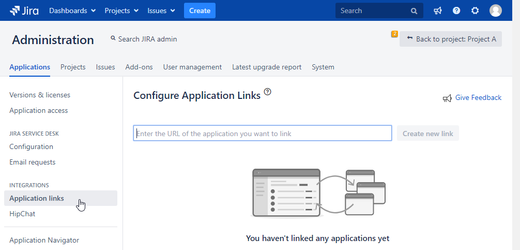
- Copy "Application Url" from the blank on Single Sign-On Setup in Activity Timeline → to blank on Configure Application Links tab in Jira
- Click "Create new link" button → Click "Continue"
- Tick "Use this URL" checkbox
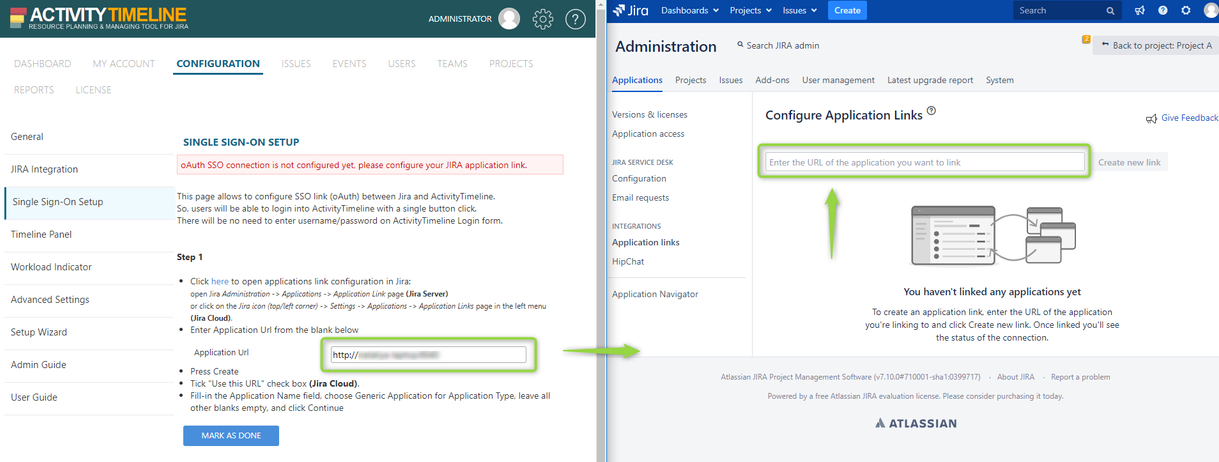
- Fill-in the "Application Name" field, choose Generic Application for Application Type, leave all other blanks empty,
 and click "Continue" button
- On Single Sign-On Setup page in ActivityTimeline click "Mark as done" button
Click "Generate" button:
Public Key is created.
- Click on a pencil icon on Application Links page created in Step 1

- Choose Incoming Authentication link and fill-in the details using data from ActivityTimeline in Step 2
- You can leave all other fields as default
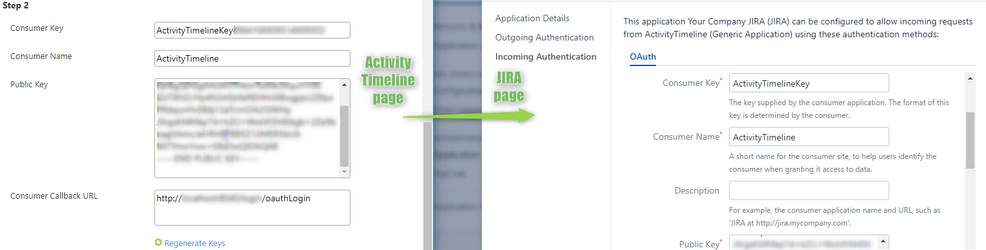
- Click "Save" button on Jira Application Link Configuration
- Click "Verify" button on Single Sign-On Setup page
Jira should ask whether you allow the connection as a currently logged-in Jira user.
Click "Allow" to grant connection and finish the setup of SSO.
ActivityTimeline will make that user as Synchronization user (that loads updates from Jira).
That should be it!