ActivityTimeline add-on with Plan page helps organizations to better plan and manage teamwork, schedule events, vacations, bookings, generate workload and timesheet reports.
Required permission:
Administrator Role;
Manager Role;
Power Employee Role;
Employee Role - can see only Teams he/she belongs to;
Limited Employee Role - able to access and see his/her Timeline only;
Team Manager Role - can see only Teams he/she belongs to.
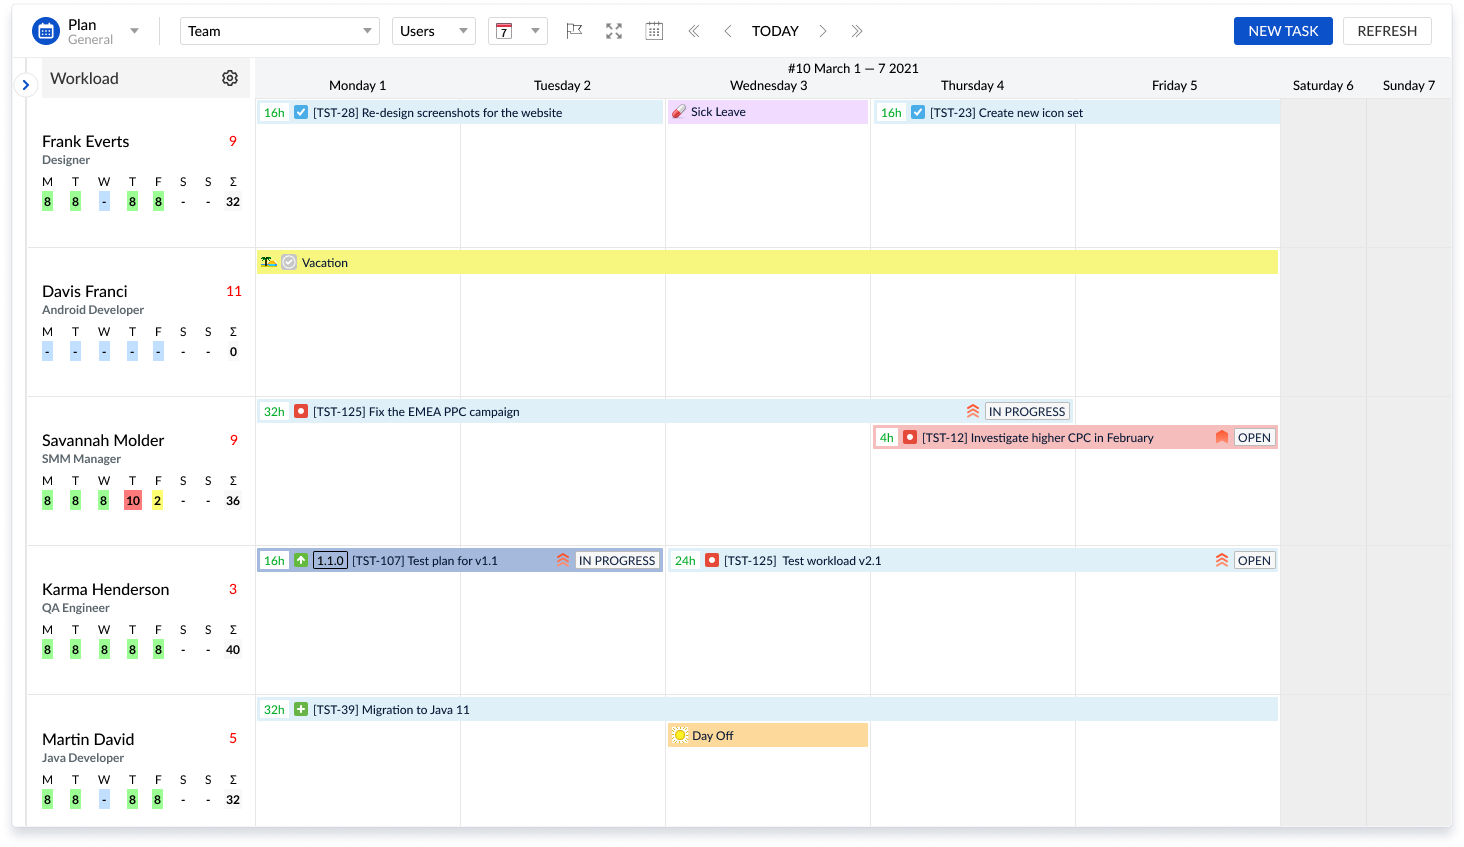
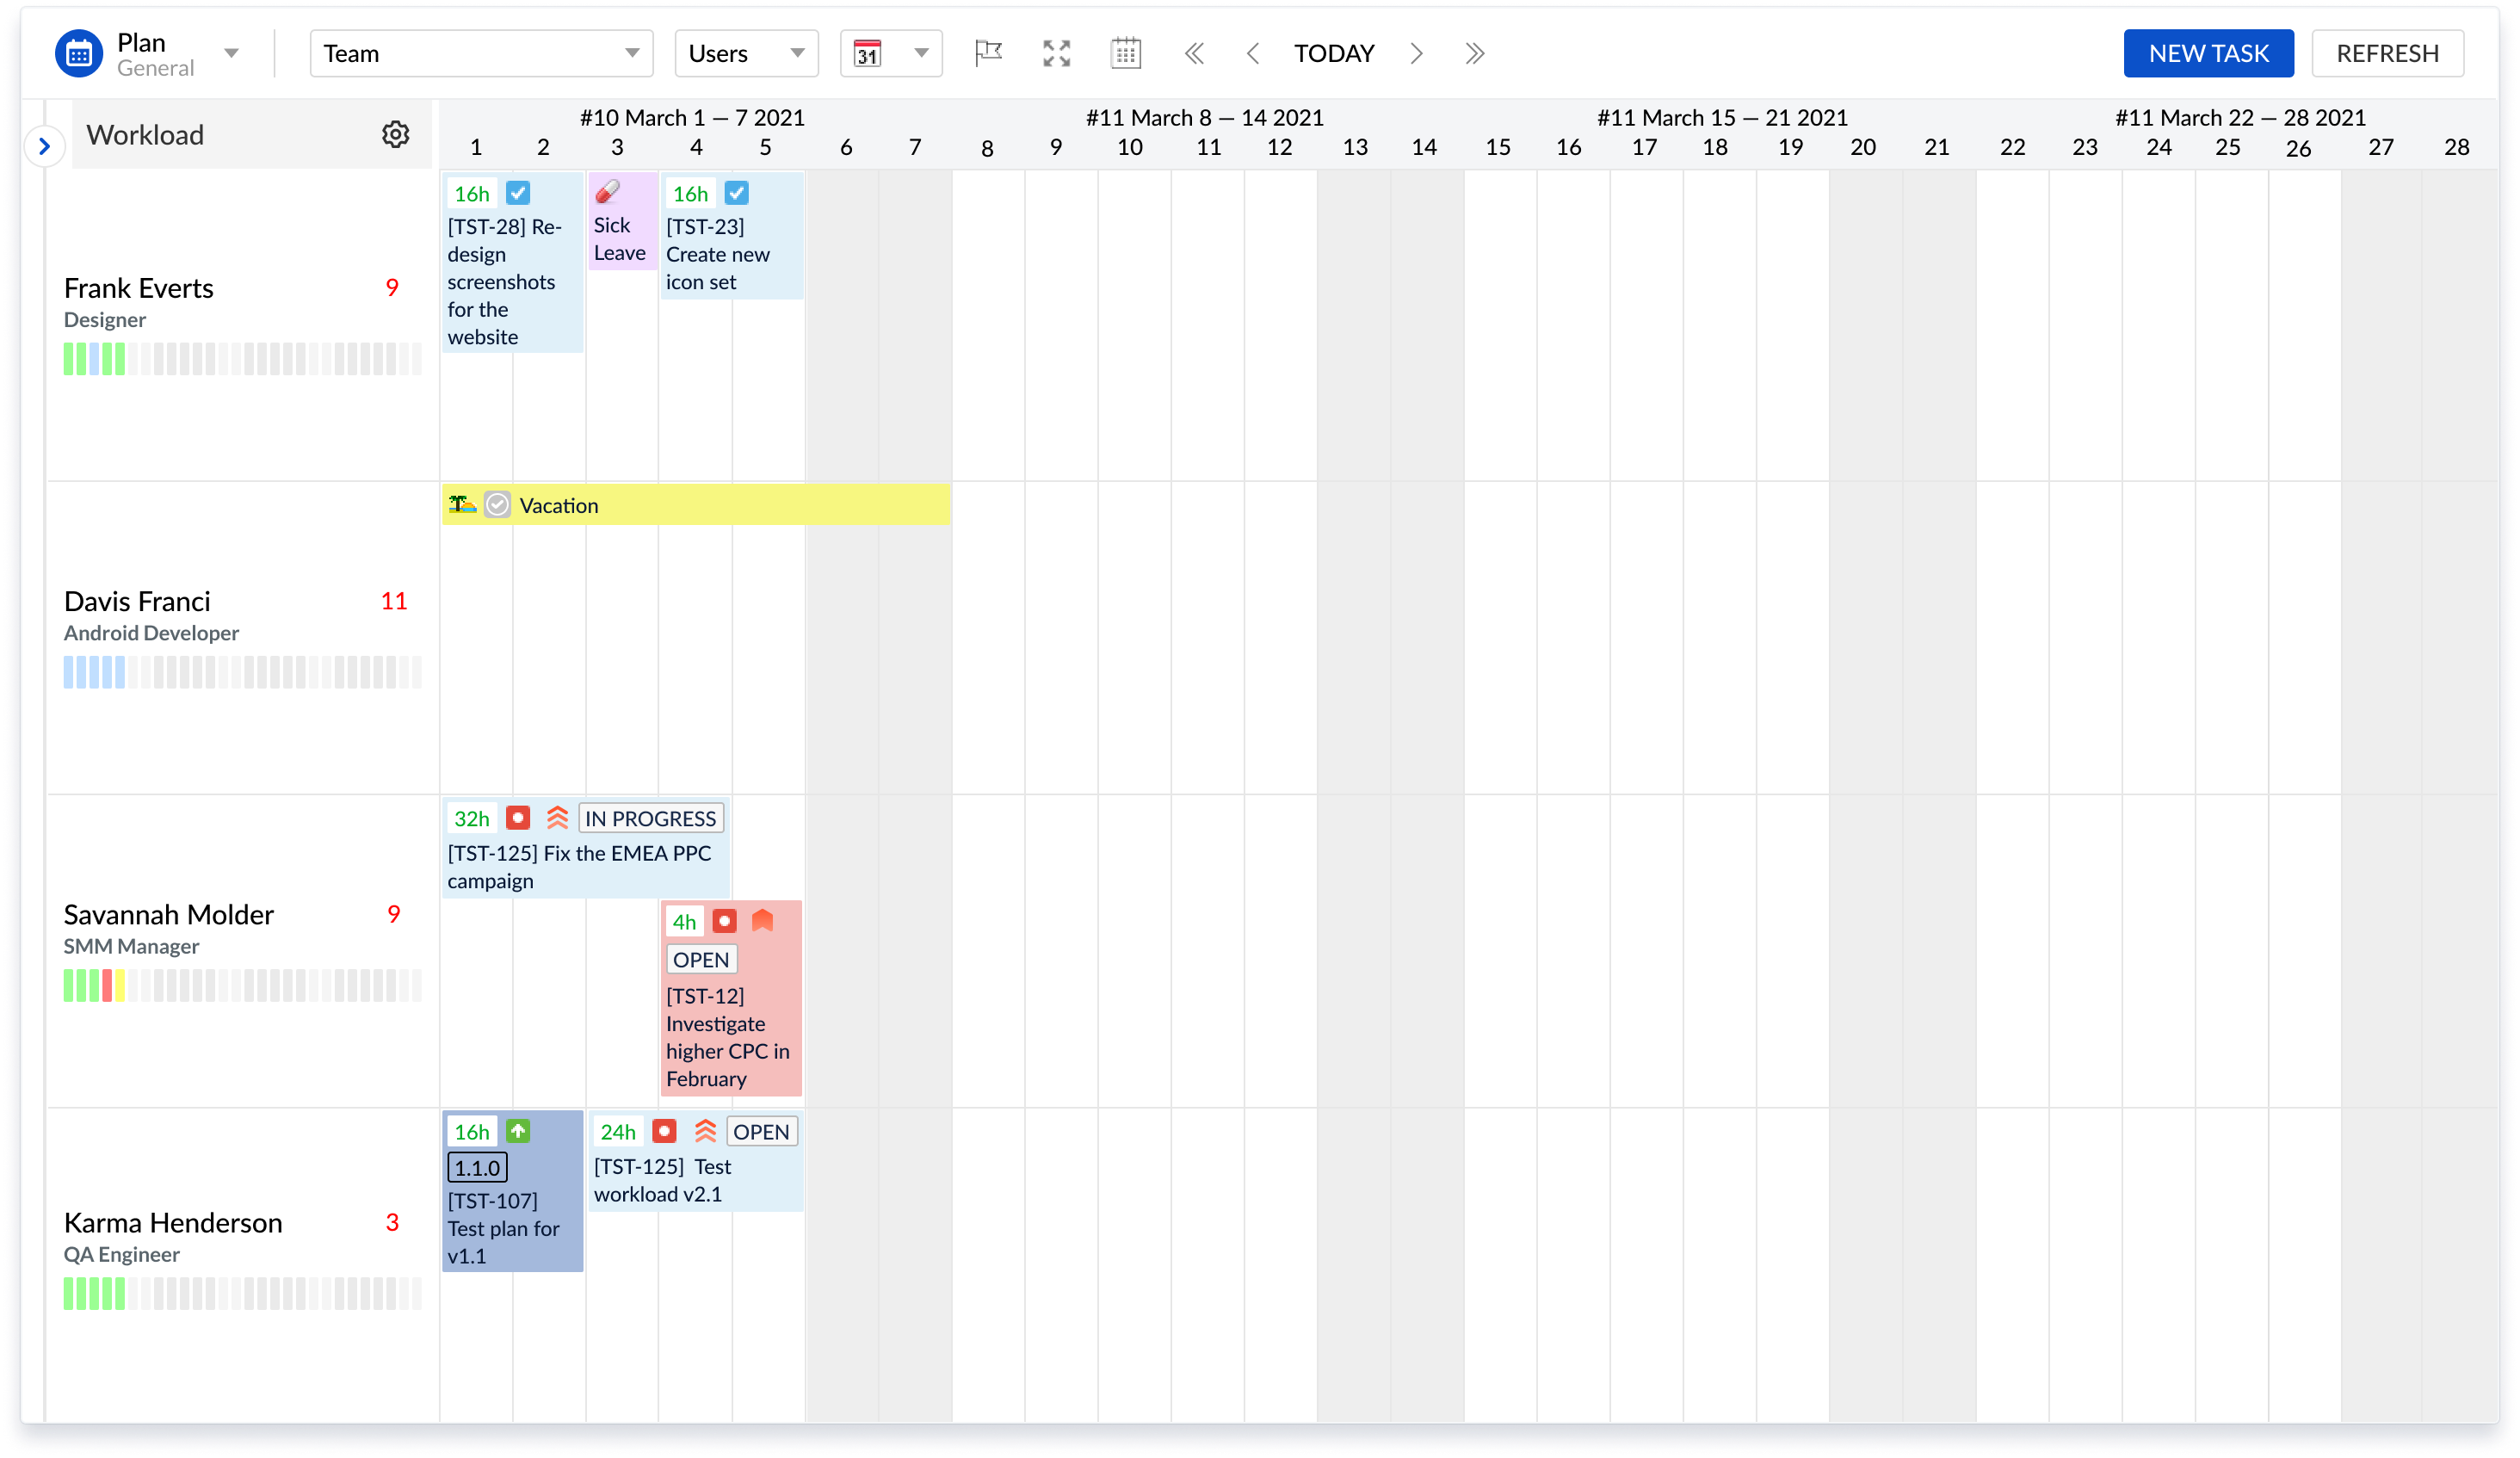
ActivityTimeline for a regular user is a dashboard with Issues (left) panel and Timeline (right) panel.
Main points:
| Table of Contents | ||||
|---|---|---|---|---|
|
Dashboard
To access the Dashboard view log into the application.
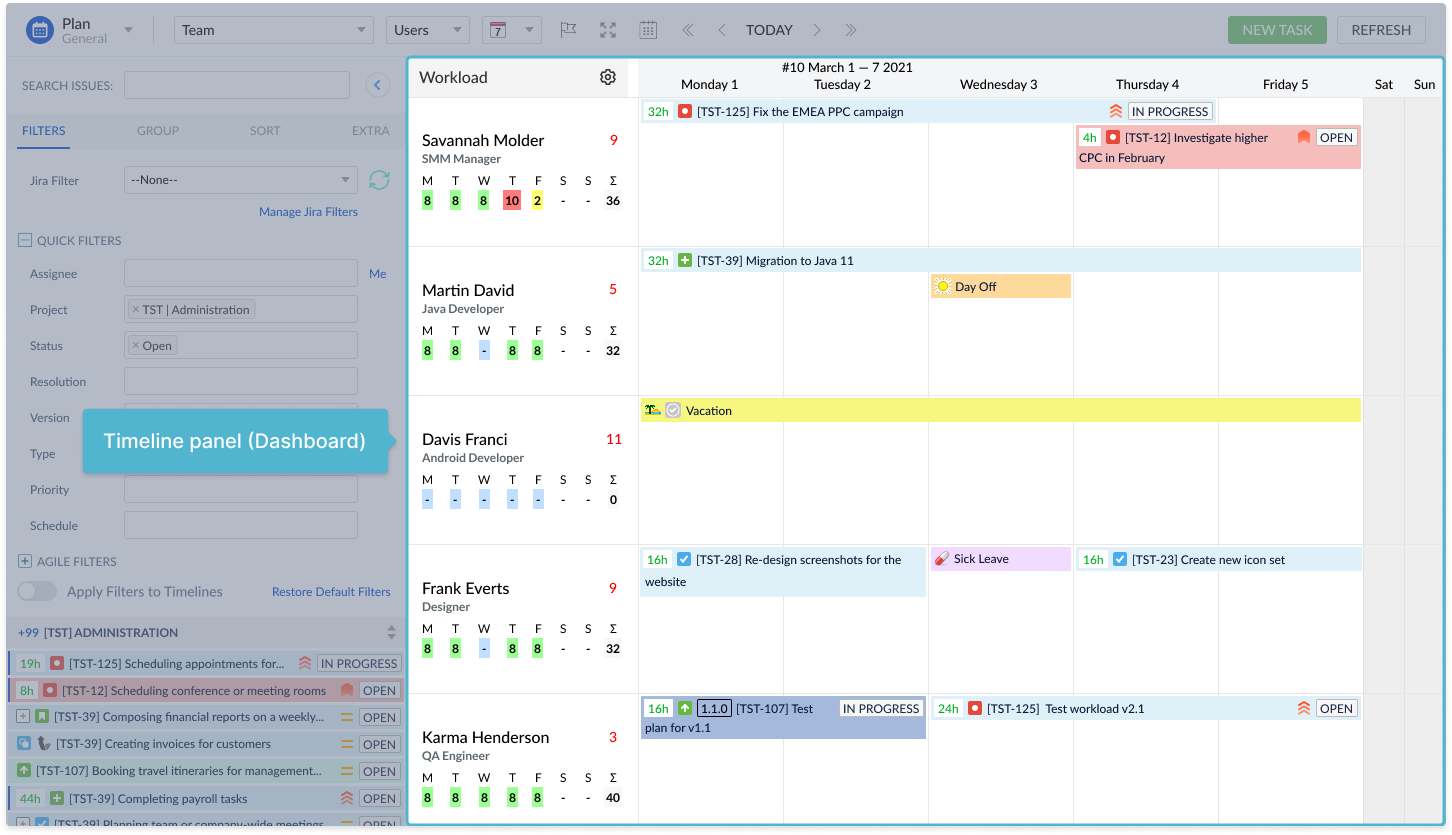
The dashboard consists of two main parts: Issues Panel on the left and Timeline Panel on the right with Milestones Panelon the top of Timeline.
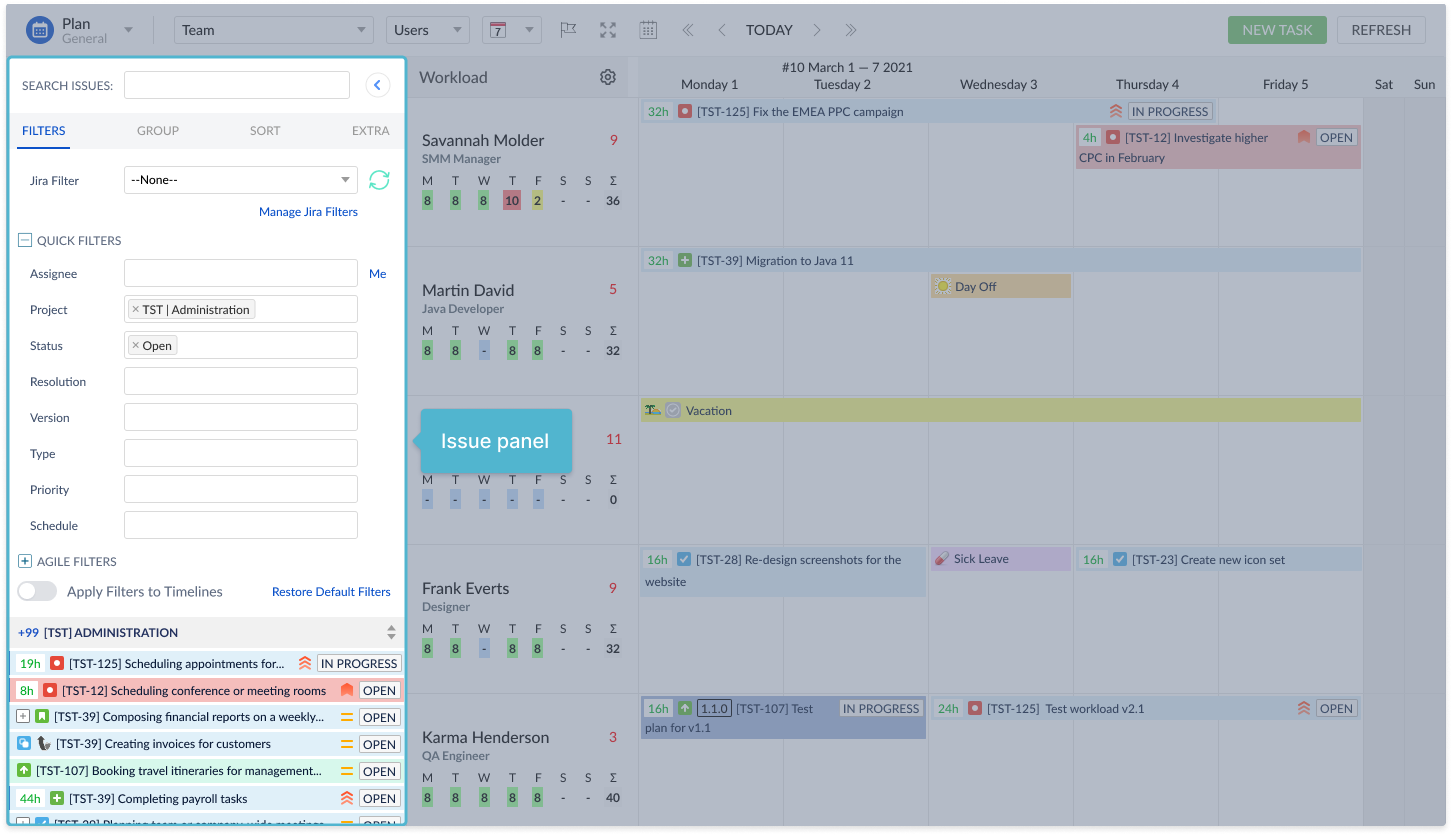
Issues Panel
Issue Panel (left) consists of a set of Jira tickets and Filter panel. The panel shows the tickets that are assigned to a currently logged user.
The view can be configured and changed through one of the four tabs. The available tabs are Filters, Group, Sort and Extra.
How to manage Jira Issues on Left Panel
All about Filters, Group, Sort and Extra tab you can find on Left Issues Panel page.
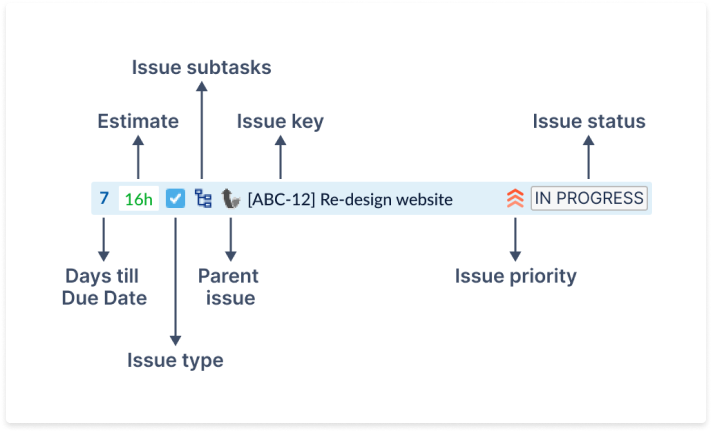
On the Issues panel each Jira ticket appears in a separate blue bar:
3 icons correspond to Issue Type, Issue Priority and Issue State.
Additional icons - Sub-task and Parent Task - indicate that a ticket is of Sub-task issue type and its parent correspondingly.
Other icons:
In the example above 8h 16h (= 8 16 hours) value in green corresponds to the remaining time estimate defined in Jira issue. If the ticket does not contain the estimate in hours, Issue Type icon appears next instead of estimated value.
The number of days left to the Due Date appears to the right of the blue bar (see as an example above). The due date on the ActivityTimeline corresponds to the default due date value defined in Jira ticket. If the due date is already missed, the days value will appear with minus, and the Issue field will become red-colored indicating the negative number.
The detailed description can be found on Left Issues Panel page.
From Week Scope:

To Month - Daily Scope:
Operations on the Timeline
Milestones Panel
How to create Milestones panel
Milestones Panel is an additional panel appearing above the team members timelines. Milestone is a special event that requires special attention or high-level data like releases, demos, deadlines, events etc.
Milestones can add significant value to project scheduling. They represent if a project is on schedule.
There are three ways to add a Milestone:
Create Milestone on Milestones Panel by clicking on it;
Set a Due Date in Jira issue;
Select a project to see Fix Versions.
By default, Milestones Panel is hidden from the dashboard. To open it, click on a flag icon on the right panel toolbar.

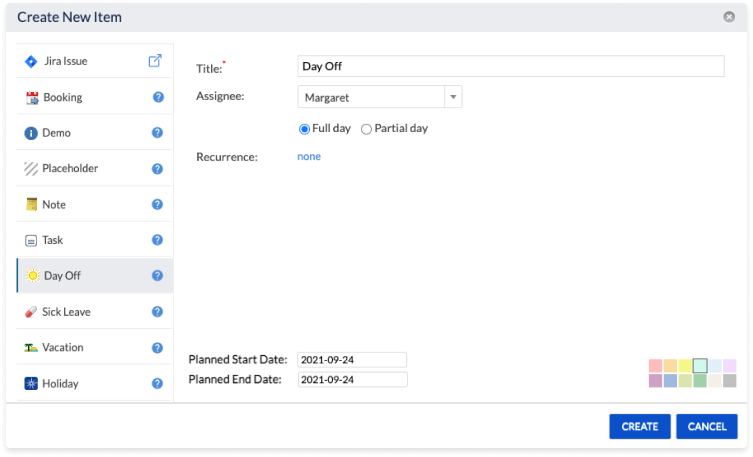
Click on an empty cell in Milestones Panel to open a dialog for a new item creation.
To create your own event type navigate to Milestones Event Type page or choose from the list of available options:
Milestone
Event
Release
Delivery
Deadline
How to manage Jira tickets
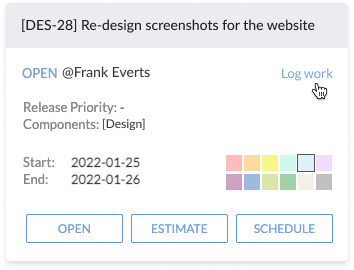
Issue Card
Issue Card displaying the main information about Jira issue or any event on a Dashboard or on a Left Panel.
Issue Card can be opened by clicking on the issue on the Left Panel or on the Dashboard.
On Issue Card you can find the following information about:

All fields possible to customize (show or hide) on Issue Card (for Admin role). To read more about the Issue Card go to Issue Card page or how to customize the Issue Card go to Issue Card Appearance page.
The main functionality that will be useful to you:
1. Status changing by clicking on Status:
2. Logging Work:
You can read about logging work on Worklog, Estimate and Time Tracking page.
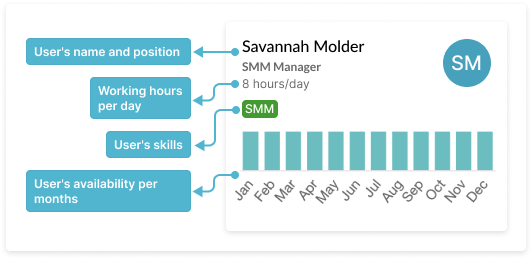
Personal information and User Card
ActivityTimeline add-on allows seeing skills and levels on the users' profiles on Work page. Only ActivityTimeline administrators have permissions to add skills to user characteristics. The user himself/herself can add skills only to his/her profile on My Account page, not other users profiles.
User Card appears by clicking on the Users' name or position on the top of the page.
User Cart includes the following information:
Creating Jira issues and custom events
You can create Jira issues and custom events directly from the Timeline panel. The base functionality is on ActivityTimeline for daily planning and you won't need to refer to Jira. All Jira issues is synchronized from ActivityTimeline to Jira. How to do this read on HERE.
The custom events can be created is addition to help in your planning. It could be the bookings for Daily meetings, vacations scheduling, business trips booking, sick leaves or days off creation. You can customize the events according to your needs. How to do this read on Create Custom Event page.
Scheduling and Assigning Work
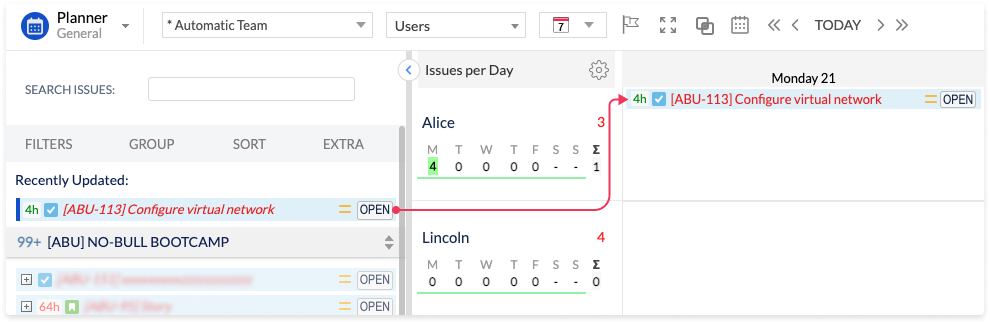
From the Timeline panel calendar drop-down select a Week view and find the required task on the Issues panel.
Drag and drop the task to the timeline of a particular person that will be responsible for fulfilling the task.
Example
Example on the screenshot below demonstrates the task which is assigned to Bob Robinson, the project manager. After the task was scheduled on his timeline, the system has automatically set the start and end dates of that ticket in JIRA.
Click on the ticket to open the view in JIRA. See the Planned Start and End Dates values updated.
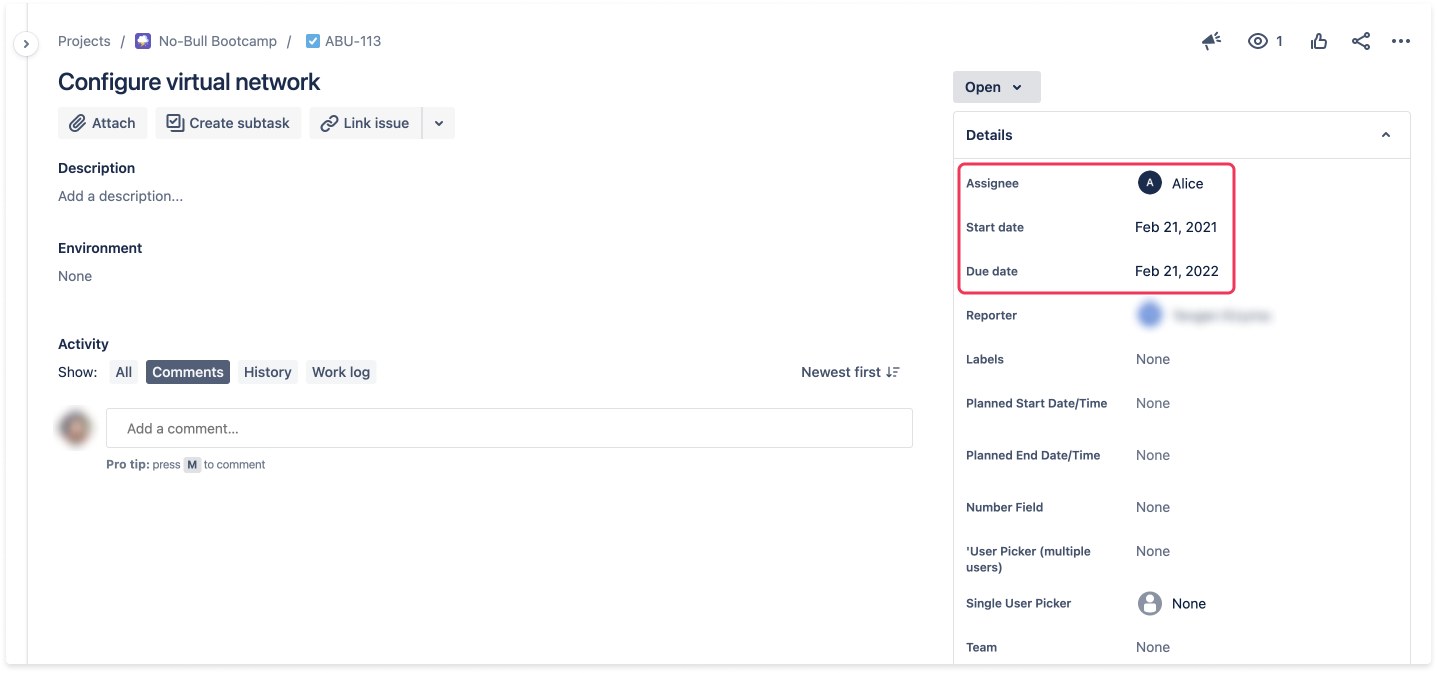
JIRA administrator can configure the accurate time liner with Date Picker field. The date is automatically aligned when a manager drags and drops the task onto dashboard.
When the Planned End Date is defined in JIRA view, close the popup window. Click Refresh button to synchronize with JIRA option or wait till the changes are synchronized automatically (automatic synchronization happens every 10 minutes). The system will update the dashboard based on the changes made.
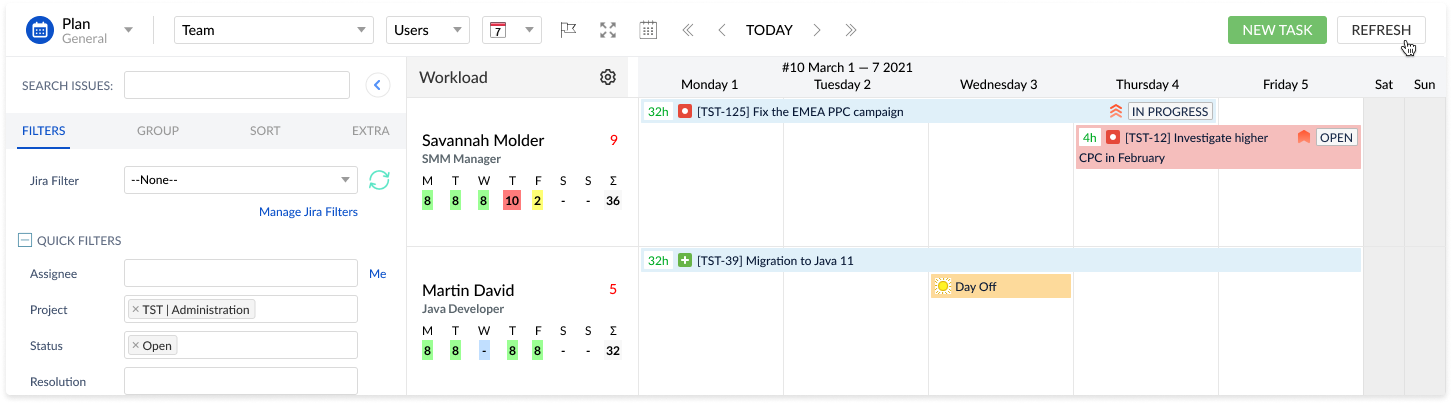
Workload Indicator
Each team member has the defined position in a team; it renders below the person's name. Team members positions as well as each person workload indicators are configurable in Users and Configuration tabs.
Workload indicator demonstrates how much work is scheduled for a person on a day of the week depending on the scope.
Workload Indicator has three Modes to show Worklogs, Workload and Availability.
To find more about the Workload Indicator Modes refer to Workload Indicator page.
Example
In the example below, 8 hours of work (PA-10) is scheduled on Wednesday. The system updates the number of hours scheduled on Wednesday for Jenny Erkins user to 8h:
Select the required task you wish to schedule (in the example above, PA-10 task is selected).
Drag and drop the task to the selected person in order to assign the task (here the task is assigned to Jenny Erkins).
The system shows a regular Green color in the calendar which indicates 8 hours of work for the one day which is a normal working day so that the person is not overloaded.
A different shades of green color indicates that not enough work is scheduled. If the defined workload value is 8 hours per day, and the team member has one task split for two days 4 hours per each day, the color of the person's calendar will be light green.
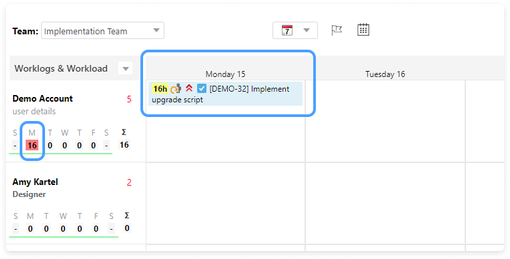
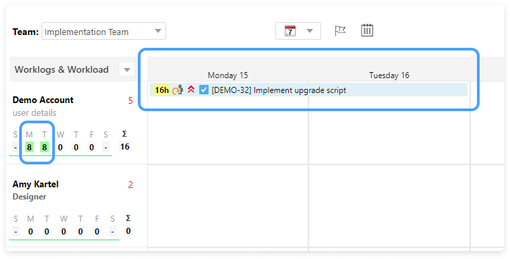
If the person is fully booked for two days (the tasks assigned are estimated for 16 hours per one day), and the manager adds the task for 8 hours more, the workload indicator shows Red color. This means that the person is overloaded on Monday, and signals to the manager that the schedule has to be fixed. The manager can simply resize the new task (in this example - [DEMO-32] Implement upgrade script) forward, and the conflict will be resolved.
![]() Frequently Asked Question. Read more.
Frequently Asked Question. Read more.
📰 Helpful tips in our Blog.
📬 Questions? Contacts Us.
🤝 Contact details for Solution partners.
Search doсumentation
| Live Search | ||||
|---|---|---|---|---|
|